Introduction to 3-way Switch Wiring
Mastering the Basics: The 3-Way Switch Setup
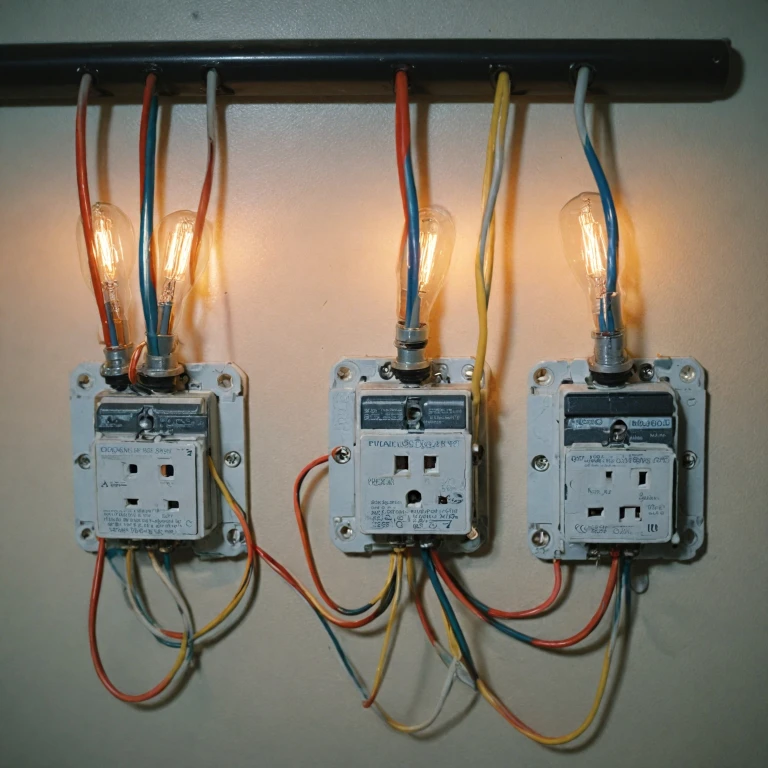
If you've ever battled with wiring in your home, particularly when trying to control a light from two different points, you've likely come across the three-way switch system. It's a handy setup that lets you flick a switch in multiple locations to power your lights on or off. Super convenient! So, how does this work? Here's a simplified take: you have two switches and a light fixture. The magic happens when the electrical power travels through a series of wires connecting these components. You'll find three wires in this mix - a black one, known as the 'hot' wire, a white, neutral wire, and a common wire, usually another black one, that ties the two switches together. For a better grip on this, think of the black hot wire as the one carrying power from the power source to the first switch. From here, electricity dances its way to the second switch, thanks to a neutral or white wire in the mix. These wires reside neatly in an electrical box, keeping it all structured and safe. Figuring out the 3-way switch wiring diagram can feel like cracking a code, especially when power is situated right at the light fixture itself. But don't fret! Each wire has its role to keep the lighting symphony in harmony. You’ll find more insights on how power positioning impacts wiring, along with some practical advice later on. This complex dance of wires can see one switch feed power to a light (or a set of lights) through the second switch. The common terminal is key here, creating the loop that lets it all shine smoothly. Each switch can alter the direction of current, allowing users to control the power light from either end. Pretty clever, right? Once you feel comfortable with this baseline knowledge, exploring how you can integrate smart lighting or tackle common issues can make any wiring novice feel like an electrical genius!How Power at the Light Affects Wiring
Impact of Power at the Light on Wiring
When setting up a 3-way switch, it's all about getting the power source right. If the power is at the light, it changes the game a bit. Here's how:- Power Source Location: In a typical 3-way switch setup, power can either start at the switch or at the light fixture. When it starts at the light, you'll need to be mindful of how the wires run from the light to the switches.
- Wiring Path: With power at the light, the cable runs from the light fixture to the first switch and then to the second switch. This path is crucial for ensuring the switches work correctly.
- Wire Colors and Functions: Typically, the black wire is the hot wire, which carries power from the light fixture to the switches. The white wire, often the neutral wire, returns the current to the power source. In this setup, pay attention to the common terminal on each switch, as it connects the switch to the power source or the light fixture.
- Switch Box Configuration: When dealing with power at the light, the switch boxes will contain travelers and a common terminal. The travelers connect the two switches, allowing them to control the light from different locations.
- Diagram Understanding: A wiring diagram can be your best friend here. It visually maps out how the wires connect between the light fixture and the switches, helping you avoid any mix-ups.
- Practical Example: Imagine you're in a hallway with a light at one end and switches at both ends. With power at the light, the wiring ensures you can turn the light on or off from either switch.
Step-by-step Wiring Guide
Steps to Wire Your 3-Way Switch with Power at the Light
So you’ve got your hands on a 3-way switch setup and now you’re baffled by wires going everywhere. Don’t worry, wiring a 3-way switch can be tricky, but with the right direction, it gets easier. Roll up your sleeves and let’s get started on a wiring adventure! First things first, let’s gather what you’ll need:- Two three-way switches
- Black, white, and green wires
- Electrical box
- Light fixture
- Screwdriver
- Wire connectors
- Electrical tape
- Connect the black power wire: Run your black wire (also called the hot wire) from the power source to the first switch’s common terminal. This gives the switch its power. Wrap some colored tape around the white wire to indicate it's acting as a hot wire.
- Hook up the connecting switches: Use the three-core cable to connect terminal one, running two wires (one black, one white) between switches. The white wire can act as a neutral, and the tape shows it as a hot conductor.
- Light fixture time: Connect a wire from the second switch to the light fixture’s power terminal. Don’t forget to ground every metal box and fixture for safety.
- The Family Handyman. “How to Wire a 3-Way Switch.”
- Electrical-online.com. “Wiring a 3-Way Switch.”
- Energy.gov. “Lighting Choices to Save You Money.”
Smart Lighting Integration
Integrating Smart Lighting into Your Setup
So, you've got your three-way switch wiring all set up, and now you're thinking about adding some smart lighting to the mix. It's a great idea! Smart lighting can bring a whole new level of convenience and efficiency to your home. But how do you actually integrate it into your existing setup? Let's break it down.
First off, you need to know what kind of smart switch or light you're dealing with. Some smart lights work with existing switches, while others require a complete swap-out. Check the specifications of your smart device to see if it's compatible with your current wiring diagram.
Here's a quick step-by-step guide to get you started:
- Turn Off the Power: Safety first! Always switch off the power at the circuit breaker before touching any wires or switches.
- Remove the Existing Switch: Carefully unscrew the switch from the box. You'll see the black wire, white wire, and possibly a red or neutral wire connected to it.
- Connect the Smart Switch: Follow the manufacturer's instructions to connect the wires to your new smart switch. Usually, you'll connect the black wire to the common terminal, the white wire to the neutral, and any additional wires as specified.
- Install the Smart Light: If you're using a smart bulb, simply screw it into your light fixture. If it's a smart fixture, follow the wiring instructions to connect it to the power feed.
- Set Up the App: Most smart lighting systems come with an app. Download it, follow the setup instructions, and voila! You're ready to control your lights with your smartphone.
Remember, smart lighting isn't just about convenience. It can also help you save energy and enhance security. Imagine being able to turn off all the lights with a single tap or have them turn on automatically when you're not home. Plus, if you ever run into issues, just refer back to your wiring diagram and check the connections.
By the way, if you're curious about how light controllers can play a role in smart lighting, check out this guide on light controllers.
Incorporating smart lighting into your home doesn't have to be a hassle. With the right tools and a bit of patience, you can transform your living space into a smart, energy-efficient haven.
Troubleshooting Common Issues
Common Hiccups and Quick Fixes
As you explore the intricacies of 3-way switch systems, you might encounter some common stumbling blocks. Don’t worry, these can be addressed with a bit of persistence and knowledge.
Firstly, if your light fixture isn't working correctly, you’ll want to ensure that the wiring is set up right. Double-check that connections are secure in the electrical box and verify that the power's actually on—sometimes it’s the simplest solutions that get overlooked.
If the lights buzz or flicker, it could be due to loose wires or an inappropriate bulb type. Make sure your bulb matches the fixture requirements—LEDs are a popular and energy-efficient choice. If the buzzing persists, investigate if the white wire, known as the neutral wire, is correctly connected. A good connection reduces disturbances and keeps your lights steady.
Misconnections between the light fixture and the common terminal could also throw you off. Often marked in a wiring diagram, the common terminal is there to direct the switch power appropriately. Ensuring it's linked correctly will help keep your system running smoothly.
For those incorporating smart lighting components, be mindful that some systems require all switches to be upgraded to smart switches. Compatibility is key! If you’ve integrated smart lights but they aren't syncing well, it might be a compatibility issue, so reviewing the setup or consulting your smart light’s support can be really helpful.
By tweaking these connections and making sure every wire is in its right place, notably the black wire, known as the hot wire, you're well on your way to troubleshooting and fixing niggles as they arise.
Practical experience always adds a layer of confidence. Remember, detailed diagrams and labeling wires with tape can be lifesavers. And when in doubt, consulting with an electrician can make all the difference.
Future Trends in Smart Lighting
Looking Ahead: The Future of Smart Lighting
Smart lighting is rapidly evolving, with new innovations surfacing that could redefine how we think about lighting in our homes and workplaces. As technology advances, the integration of smart features into light switches, fixtures, and overall switch wiring systems holds the promise of creating even more efficient, user-friendly environments. One exciting trend is the shift towards energy-efficient smart lights that link directly to your home's electrical system. Through this, users can have power at the light controlled with just a slip of a finger or a voice command, ensuring convenience and sustainability. The integration of smart home assistants with light switches is also on the rise. With these systems, controlling light fixtures, even those connected to a complex 3-way switch wiring setup, becomes seamless. It respects the wiring needs, like those of black and white wires, ensuring integration without a fuss. Imagine walking into a room and having the power switch bring the lights up to your preferred brightness, all through voice control. Another promising area is in the safety and functionality of our homes. With smart systems connecting switch power to other smart devices, homes can adjust lighting according to whether people are present in the room, enhancing security and energy efficiency. The cable layouts for such systems have been refined to make the installations as easy as setting up a smart device. Moreover, smart lighting is starting to involve more interactive capabilities. Lights could soon analyze room usage, ambient conditions, and provide suggestions for adjustments directly to your smartphone. This means your phone would communicate directly with light switches, offering a more intimate understanding of how lights affect moods and productivity. The potential for future development in smart lighting is vast. Whether you're updating a simple light switch or rewiring an entire system with switches and fixtures, staying tuned into future trends will keep your setups ahead of the curve. Sources:- "Understanding Light Controllers in Smart Lighting," Smart Light Guru. https://www.smart-light-guru.com/blog/understanding-light-controllers-in-smart-lighting
